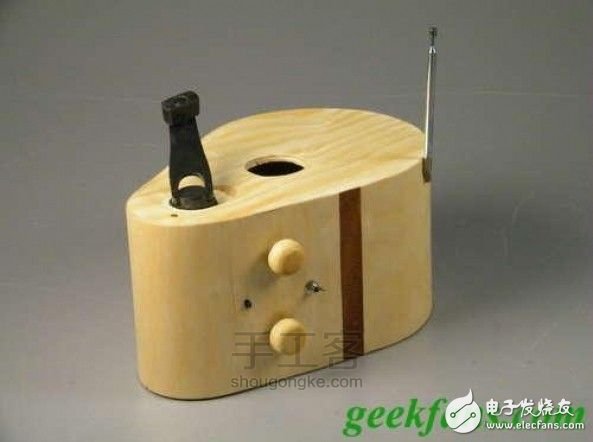
This is a radio made purely for environmentalists. The materials are all recyclable, most of which are found in waste dumps. The most important thing is that charging is done by hand.
step 1:
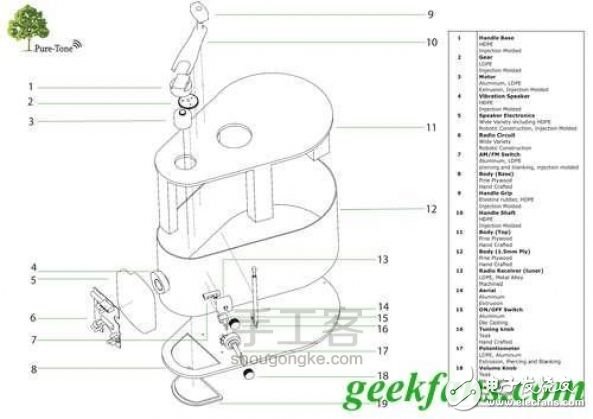
Structure overview
Step 2:
Electronic device
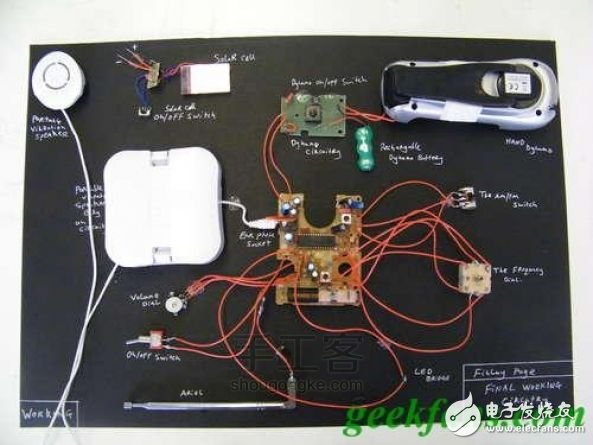
First of all, we need to get a radio that is damaged but works normally. Once we have a suitable radio, we must disassemble it to get the internal circuit, and then proceed to unsolder unnecessary components or components that need to be enlarged. The circuit is in the center of the picture, with a large bundle of wires extending out. My circuit board is neatly arranged and tightly structured, without any confusion at all.
Step 3:
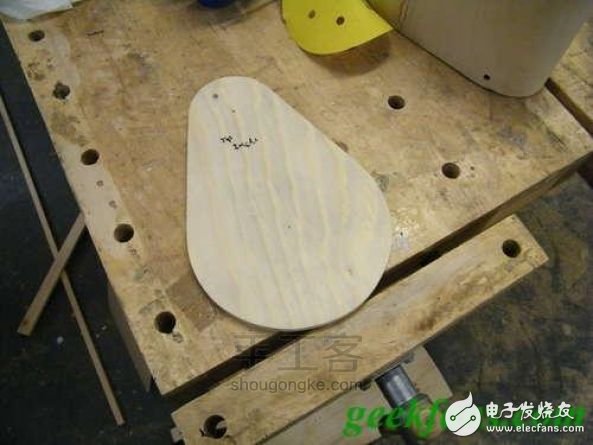
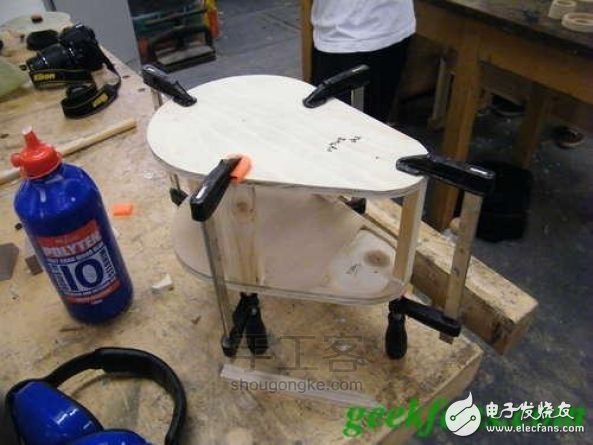
Shell making
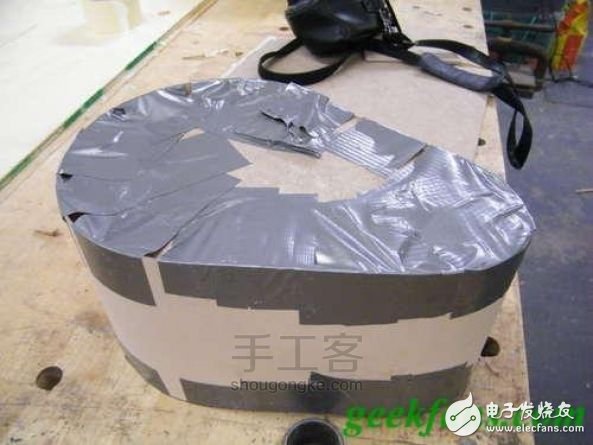
The first step is to cut out the shape of the radio casing from the 200 x 300 x 5mm plywood. The shape is shown in the picture (it can also be changed according to your own taste). I tried to make it look like a guitar.
After cutting out the basic shape, outline the copied lines around it on the other plywood. Make sure that the lines are precise, strict, and identical in size. This is very important, because the exact same shape helps to glue the wood chips together and frosting.
Step 4:
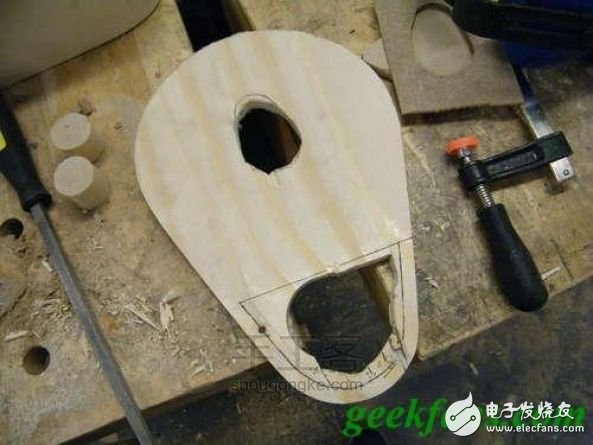
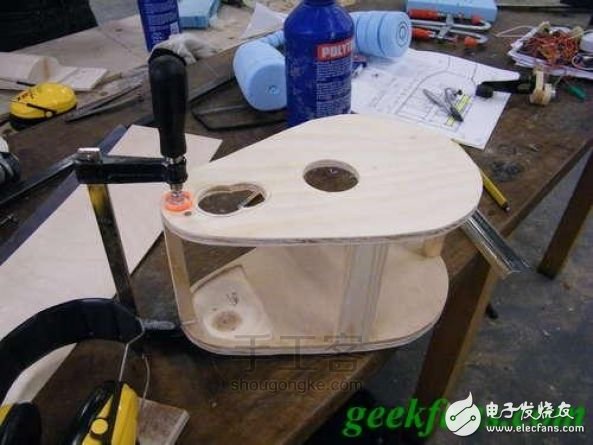
Cutting the bottom plate
Now we are about to start cutting the basic pattern. At this time, a small door should be reserved for the interface of the electronic component. In order to ensure the safety of the radio as much as possible, the housing needs to be completely encapsulated, so the only access point for the electronic components is a small movable panel on the bottom plate. First use a pen to draw the shape of the part that needs to be cut. From the picture you can see the line I drew. The cutting work after tracing is also very easy. The best way is to drill a small hole with a drill. After the small hole is formed, only a hack saw can cut the remaining part.
After this step, the cutting line will appear very rough and must be smoothed with a wooden file. When you are satisfied with the small hole in this 110 x 90 x 5mm plywood, please mark its shape so that you can roughly understand the size of the lid, because we need to cut out a flat plate of this size and fill it into the base as a lid. Remember, the lid and the small hole must fit very tightly, and you must be careful, only cut a few small pieces at a time.
When the slab is perfectly filled, you can move on to the next step.
Step 5:
Step 6:

Step 7:
Step 8:
Step 9:
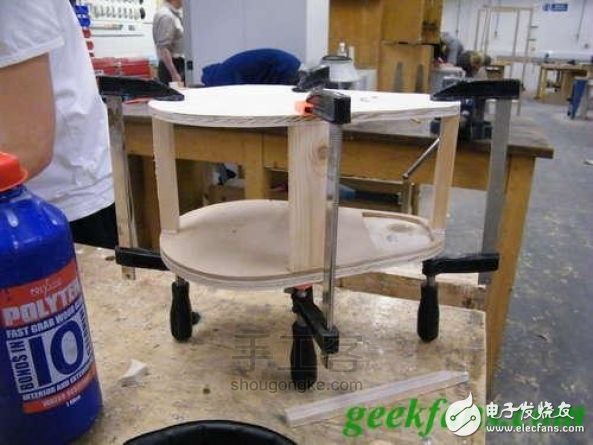
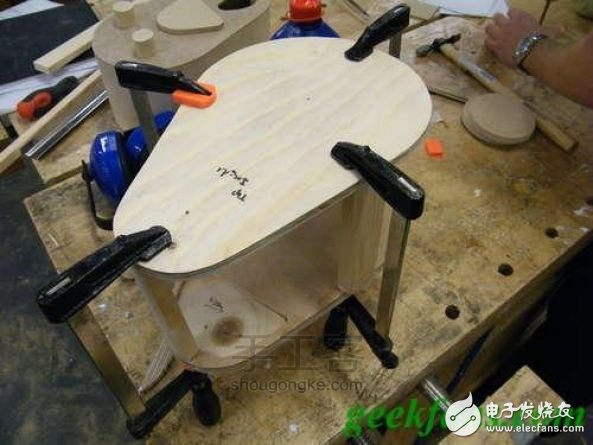
The next step is to build the stereo height of the radio. We want it to be 140mm high, so 600 x 30 x 20mm pine plywood is used to make the frame. First cut the pine plywood into 4 pieces, each with a size of 130 x 30 x 20mm. When they are added to the thickness of the bottom and top bottom plates, the overall radio will reach 140mm high.
Place the 4 elements together according to the structure shown in the figure, making sure that they overlap at the edges. To ensure that the edges are flush, the components in the initial state must slightly protrude from the edges of the top and bottom bottom plates, so that they can be flattened in a later step. The 4 components must be glued with PVC glue (not fixed with screws) to the two plates. After completing this step, clamp it with a 4-key clamp.
After the glue is dry (about 15 minutes), loosen the clamp and sand the 4 elements to make them flush with the edge of the plate. When finished, go to the next step.
Step 10:

Making the component shell
Step 11:
The next step is to build the stereo height of the radio. We want it to be 140mm high, so 600 x 30 x 20mm pine plywood is used to make the frame. First cut the pine plywood into 4 pieces, each with a size of 130 x 30 x 20mm. When they are added to the thickness of the bottom and top bottom plates, the overall radio will reach 140mm high.
Place the 4 elements together according to the structure shown in the figure, making sure that they overlap at the edges. To ensure that the edges are flush, the components in the initial state must slightly protrude from the edges of the top and bottom bottom plates, so that they can be flattened in a later step. The 4 components must be glued with PVC glue (not fixed with screws) to the two plates. After completing this step, clamp it with a 4-key clamp.
After the glue is dry (about 15 minutes), loosen the clamp and sand the 4 elements to make them flush with the edge of the plate. When finished, go to the next step.
Step 12:
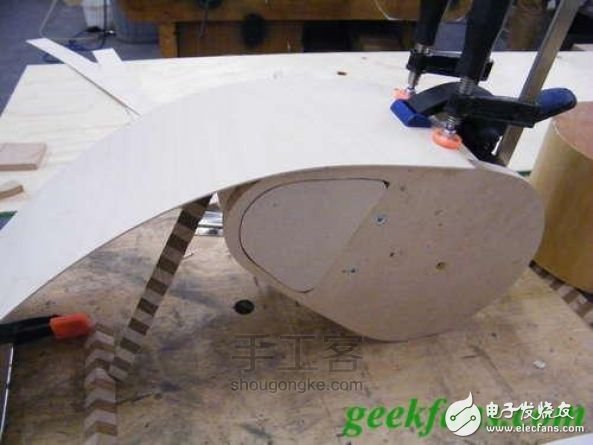
Side of the body
Step 13:

Step 14:
Step 15:
Step 16:
This step is very important, and it is also extremely error-prone. It is best to find a helper (of course, it is not impossible to do it by yourself).
Take out the 750 x 180 x 1.5mm plywood, glue it to a side post, wait 15 minutes for it to dry, and then apply glue to the quarter edge of the plate, and use the tube of glue to glue the plywood as firmly as possible To the radio body. Wait 15 minutes until it is dry, and then repeat the above steps until all sides of the body are glued.
There should be some overlap at the end, because 750mm slightly exceeds the actual length required. Trim off the excess with a Stanley woodworking knife or chisel, wait 1 hour for the body to dry out, then remove the tube glue, and polish the plywood protruding from the top and bottom bottom plates until the plywood is flush with the upper and lower bottom plates.
After this step is completed, you should be able to notice a rather inconspicuous line where the plywood touches. Take a piece of hardwood similar to mahogany or oak and cover it above the line to hide it. This process is done on both sides, and the finished design will look very smooth and beautiful.
Step 17:

Apply polishing layer
Step 18:

Step 19:

After the body parts are assembled into one body, you can try to polish it to a smooth state. When the polishing effect has reached the smoothness you expected, you can start to apply a polishing layer. I think Danish paint is the best choice, so I applied three coats. It is a good idea to sand between several polishing layers with steel wool.
Step 20:
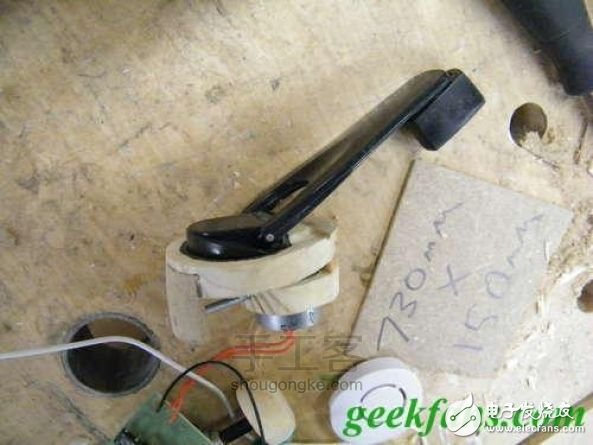
Making switches and other components
Step 21:
Step 22:
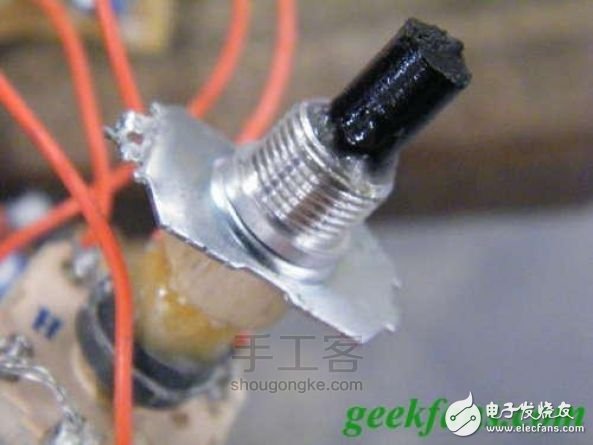
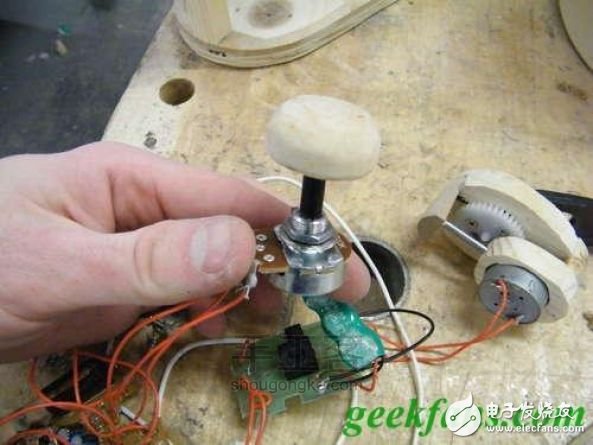
I had to make some electronic components by myself, because some of the original components were not suitable, some needed to be modified to meet the requirements, and some could not even be modified. For example, the original radio uses a disk mechanism to adjust the volume. I replaced it with a voltage divider so that the knob can be installed.
The original rotary switch is also a magnetic disk mechanical device, but it cannot be changed, so another accessory can only be installed on the machine, which is similar to a substitute for a voltage divider. Then I put the tuning device inside the radio body to better protect it.
Step 23:
Install electronic components and switches
Step 24:

Step 25:

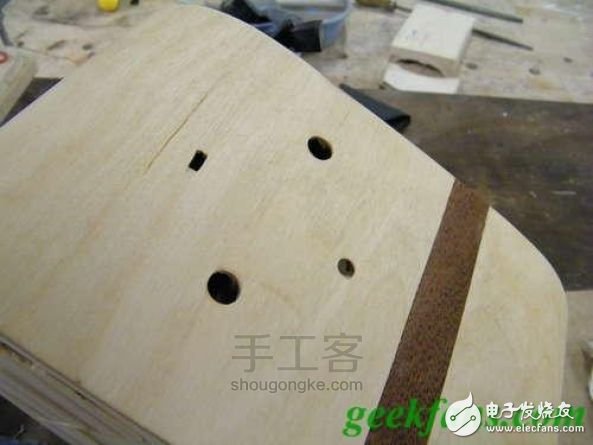
When the radio body is finished with the polished layer, you can dig holes for the switch on it. I dug a total of four holes to install the AM/FM switch dial, switch, tuning dial and volume knob.
After digging the hole, start the actual installation of the electronic components, and then install the button into the hole after the installation is completed. I only used the AM/FM switch dial and tuning dial for the original components on the radio. The switches and volume control knobs were all modified by me.
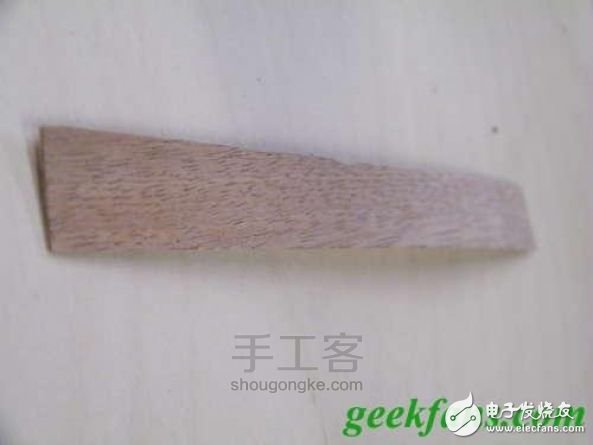
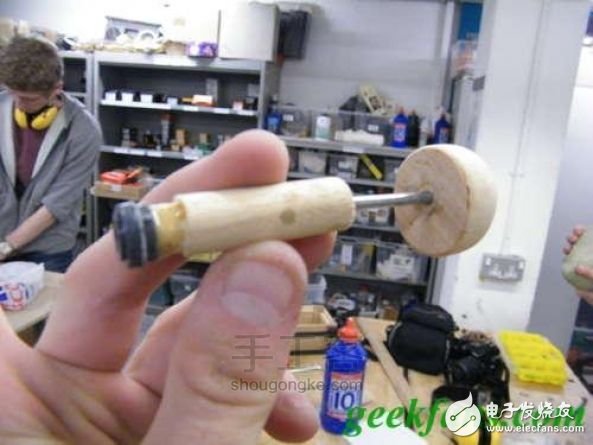
I also made a few knobs out of teak, because other components can be bought from electronics stores. After this step is completed, DIY is only the last step.
Step 26:

Finished
Ningbo Autrends International Trade Co.,Ltd. , https://www.vapee-cigarettes.com